
How to make a DIY Felt Stamp Pad

There comes a time in every crafter’s life when they need to do some stamping, but they can’t find or do not have the stamp pad they need. Your project might demand a specific color or effect, or perhaps your stamp pad isn’t big enough for your stamp. Of course, you might have just forgotten to grab replacements when you went on your last craft store supply run. Do not despair; it happens to everyone. In this post, I am going to show you how to your make your own stamp pad in just minutes, and you won’t believe how easy it is!
Many Possibilities
There are many different ways to make your own stamp pad, and each comes with its own pros and cons. For this particular project, I was using these super cute handmade potato stamps, and I wanted a quick, easy, and not-too-messy stamp pad that I could create quickly, keep for a few days, and then discard. I was not about to get potato juices and grim into my fancy stamp pads, so the occasion called for some creativity and do it yourself vibes.
Why even bother with a stamp pad?
They have been many times that we did not have stamp pads and just choose to stamp straight into our paint. The projects worked out fine, but the stamped images were messy, thick with paint, and the inconsistency in our stamped images were just plain frustrating. We used a ton of paint, got super messy, and didn’t always love the end results.
I know that household sponges were a popular choice for DIY stamp pads, but I didn’t want to create a giant stamp pad or use up any more paint than was necessary. Also, I didn’t have any sponges! My goal was to quickly throw together a functional stamp pad that would still give me crisp, clean lines and a stamped image that my potatoes could be proud of. And that, my friend, is why I created the DIY felt stamp pad.
This post may contain affiliate links and purchases made with those links may support DFW Craft Shows at no additional cost to you.

Supplies
I went into my craft bins, grabbed my crafting felt–you know the kind that cost a dime a sheet and is made of recycled plastic? And I got to work. The supply list for this homemade stamping pad is short, sweet, and cheap:
- felt
- scissors
- stamp or potato stamp
- acrylic paint
- plate or tray
- saran wrap
1. Measure & Cut
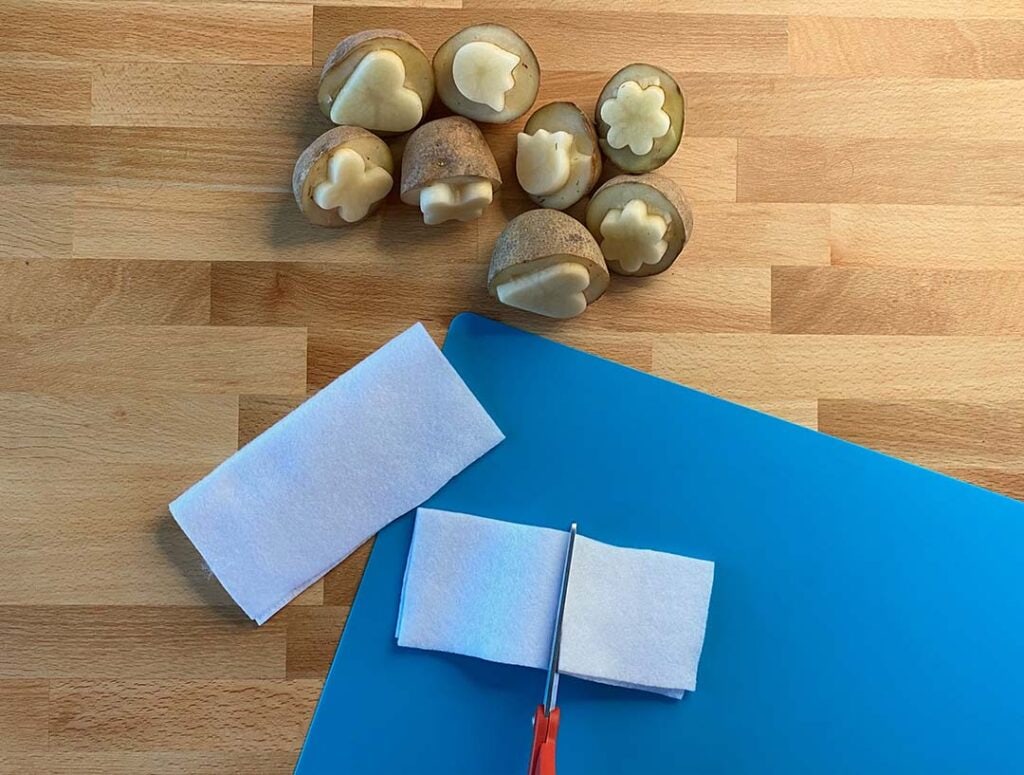
Grab your stamp and place it on your felt. You want your stamp pad to be slightly bigger than your actual stamp. Mark and make measurements as you would like, or simply eyeball the size like I did. This was suppose to be quick and easy, remember?
Using sharp scissors, cut out your approximately measured stamp pad squares. I folded my felt sheet over and cut out about a dozen squares from the sheet. You will need one square per each color you want to work with. What I don’t use today, I will use next time. And you can bet I will be setting my felt scraps aside for future stamp pads as well.

2. Prep your paint
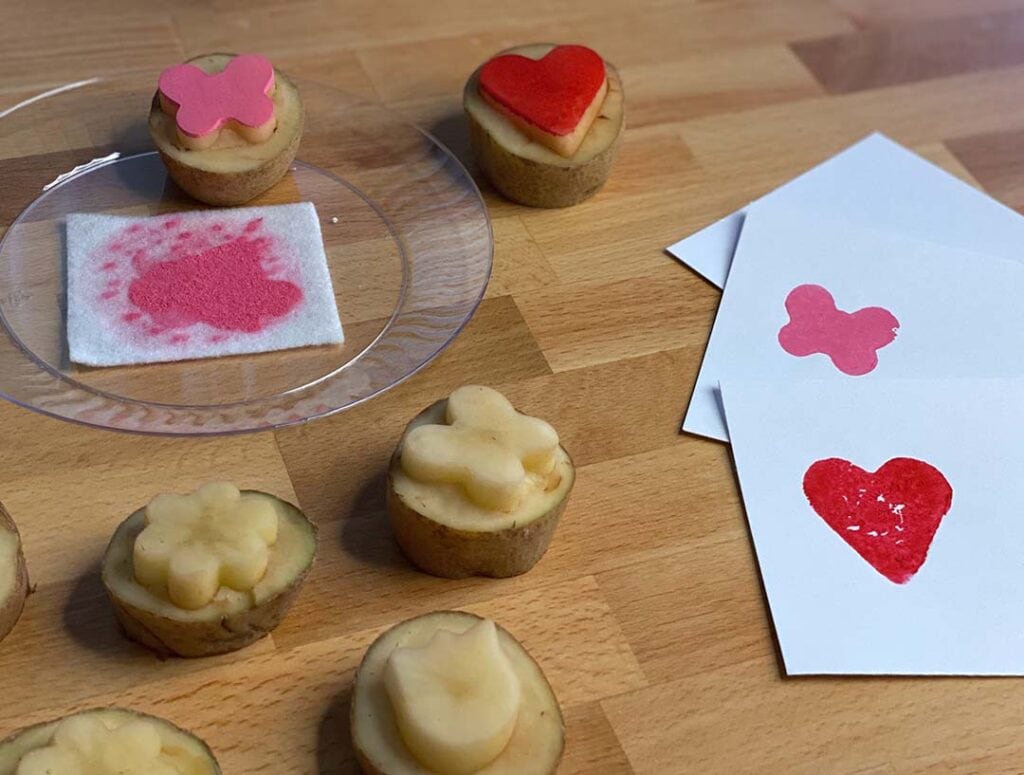
Place a dollop of paint onto your paint plate or tray, I used about a quarter to a half dollar size dollop for my stamps, but how much paint you need is going to depend entirely on your project and your stamp size. Don’t worry though, you can always add more paint later. If you are mixing more than one color for your stamp pad, grab a q-tip or a toothpick and mix the paint now. You can also create great marbling and rainbow effects for your stamp pad.
Let the paint spread a bit, and then slowly place the felt down on the paint. You can push it down gently, but your goal is for the felt to spread and absorb the paint without squishing it out the sides. Be deliberate in how you are pressing and smoothing the felt down until you’ve got your perfectly DIYed felt stamp pad.
Let your new stamp pad marinate for a few minutes. It’s not necessary, but it’ll make your first stamp that much better. (I use this time to start gathering up my other supplies so I can get started stamping.)

3. Get to stamping!
For your first stamp, you will want to press your stamp down, check the coverage, and press it again if you have missed any spots.
Wasn’t that super easy? I made several stamp pads for my kids with about a 1/4th the paint they would have used if they were free ranging it with the acrylic paints. I couldn’t believe how crisp and clear the edges were. And, bonus points, the paint application was thin enough to dry quickly and negate any warping or sogginess that might have happened without the stamp pads. The whole process was extremely satisfying.
Don’t have the perfect stamp?
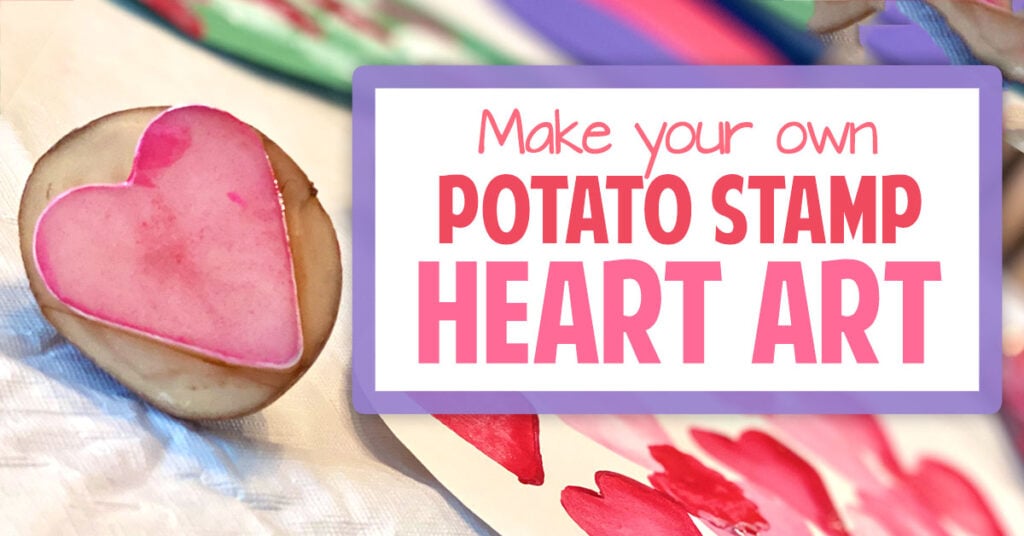
Why not make your own? All it takes is a potato, a cookie cutter, and a little creativity. Potato Stamps are a super fun way to make your own custom stamp designs in just a few minutes. Make your own with this simple tutorial.
Bonus Tip: Turn Your Art Into Cards
Every time we are getting knee deep in art, I bring out a few blank, folded cards for us to decorate with whatever medium / process we are using that day. It’s a fun way to build a stash of beautifully decorated, handmade cards that you can reach for on any occasion.

My favorite blank, pre-folded cards are Hamilco White Cardstock Thick Paper, 5 x 7. These cards are 80LB card stock, so they really make for a lovely painting surface. I also purchased a pack of A7 envelopes in rainbow colors so that we could match our envelopes to our custom cards.


Links included above are affiliate links and may support DFW Craft Shows at no additional cost to you. DFWCS participates in the Amazon affiliate program, but DFWCS is in no way associated with Amazon or the items above. The opinions stated within are my own, and I have not received any sponsorship or free products from the aforementioned manufacturers.
Originally posted on February 11, 2022.
share


Hi, I'm Tania!
Thanks for stopping by DFW Craft Shows! Our blog is home to tons of creative inspiration, gift guides, tutorials, featured artists, and tips for small businesses trying to make their mark in the arts & crafts world.
